안녕하세요.
오늘은 deno로 웹 사이트 만들기 실습을 하려고 합니다.
배포 환경
deno에서 제공하는 SASS 서비스인 deno deploy에서 테스트 해 보려고 합니다.
Github 계정만 있다면 어렵지 않게 회원가입/배포를 할 수 있으니 관련 설명은 생략하도록 하겠습니다.
Hello World!
deno deploy에 들어가면 아래와 같이 빈 대시보드 페이지가 나옵니다.
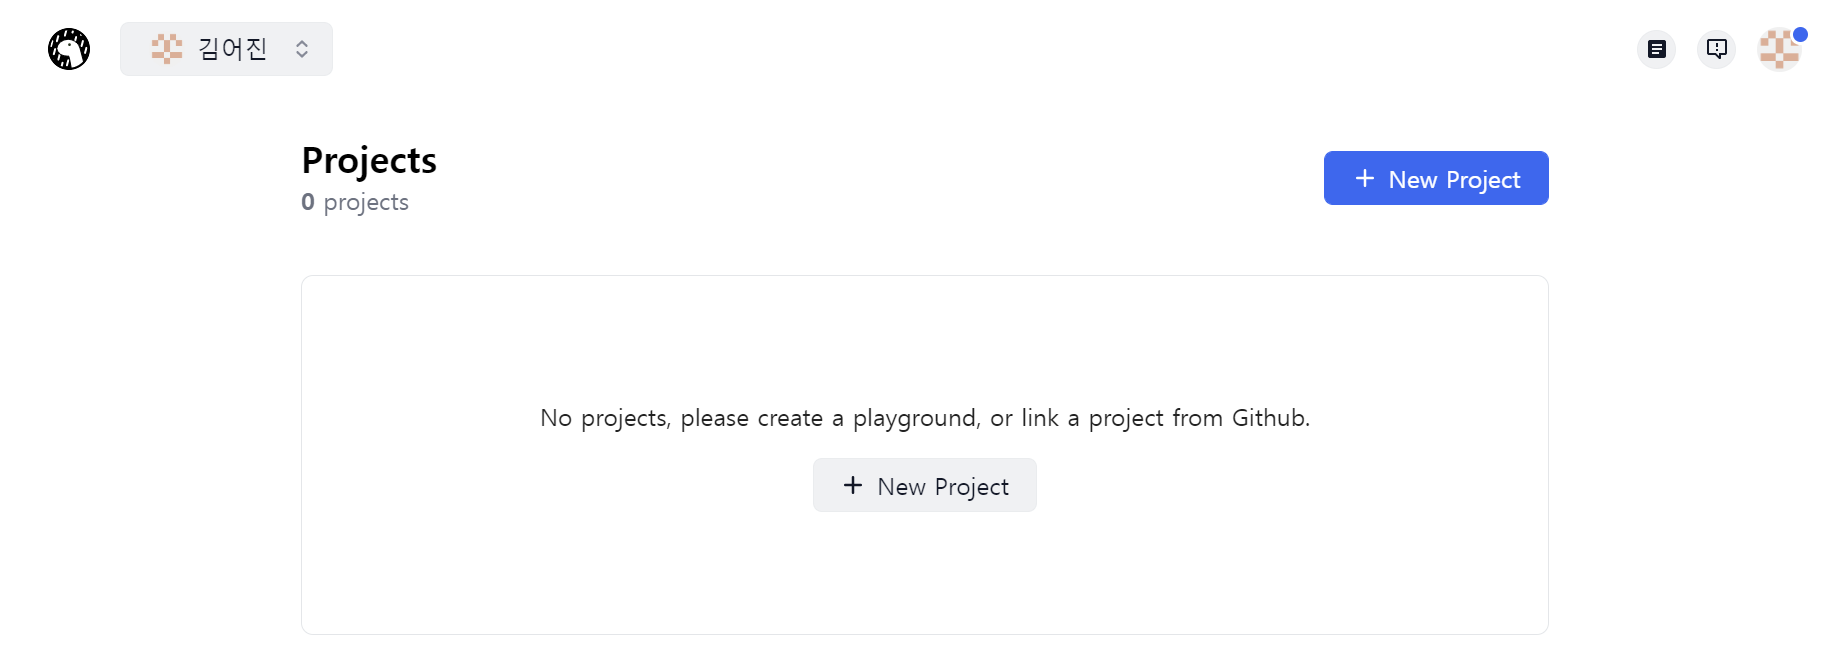
new project 버튼을 눌러 Hello Wold 프로젝트를 생성 해 보도록 합시다!
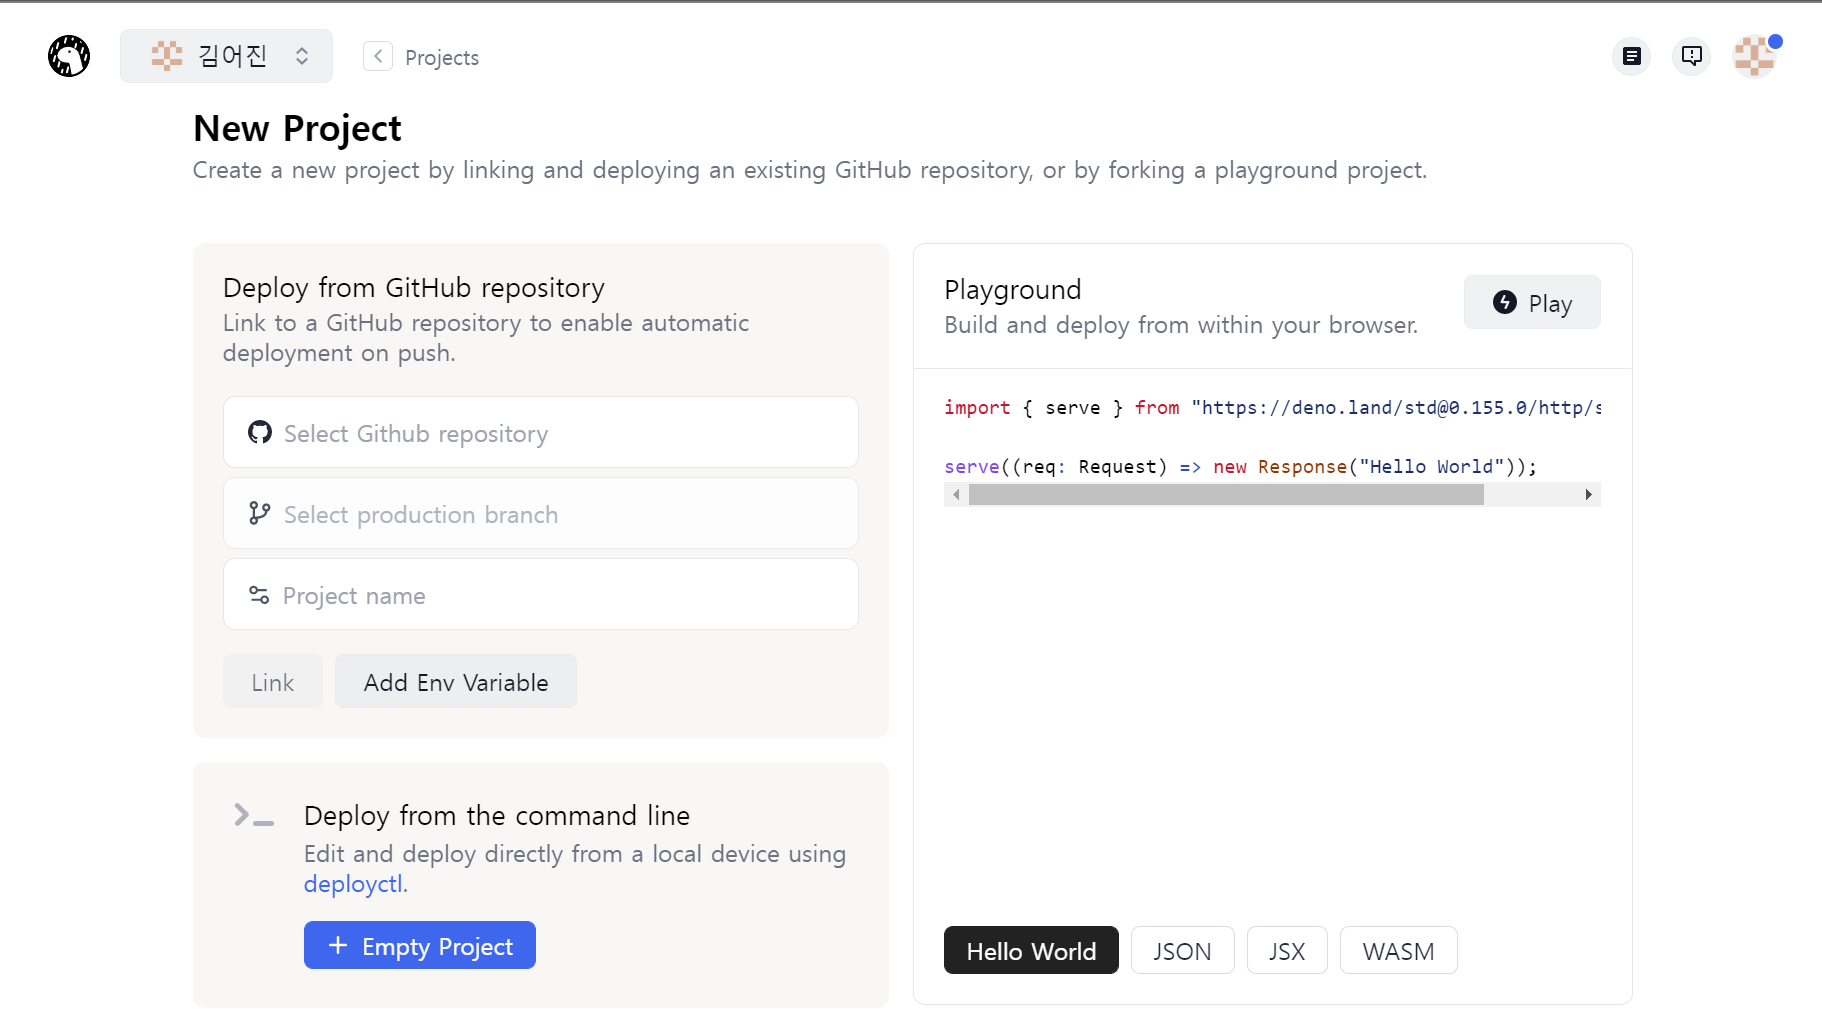
위와 같은 페이지에서 play ground 의 play 버튼을 눌러봅시다.
조금 기다리면 아래와 같은 Hello World 프로젝트가 생성되게 됩니다.
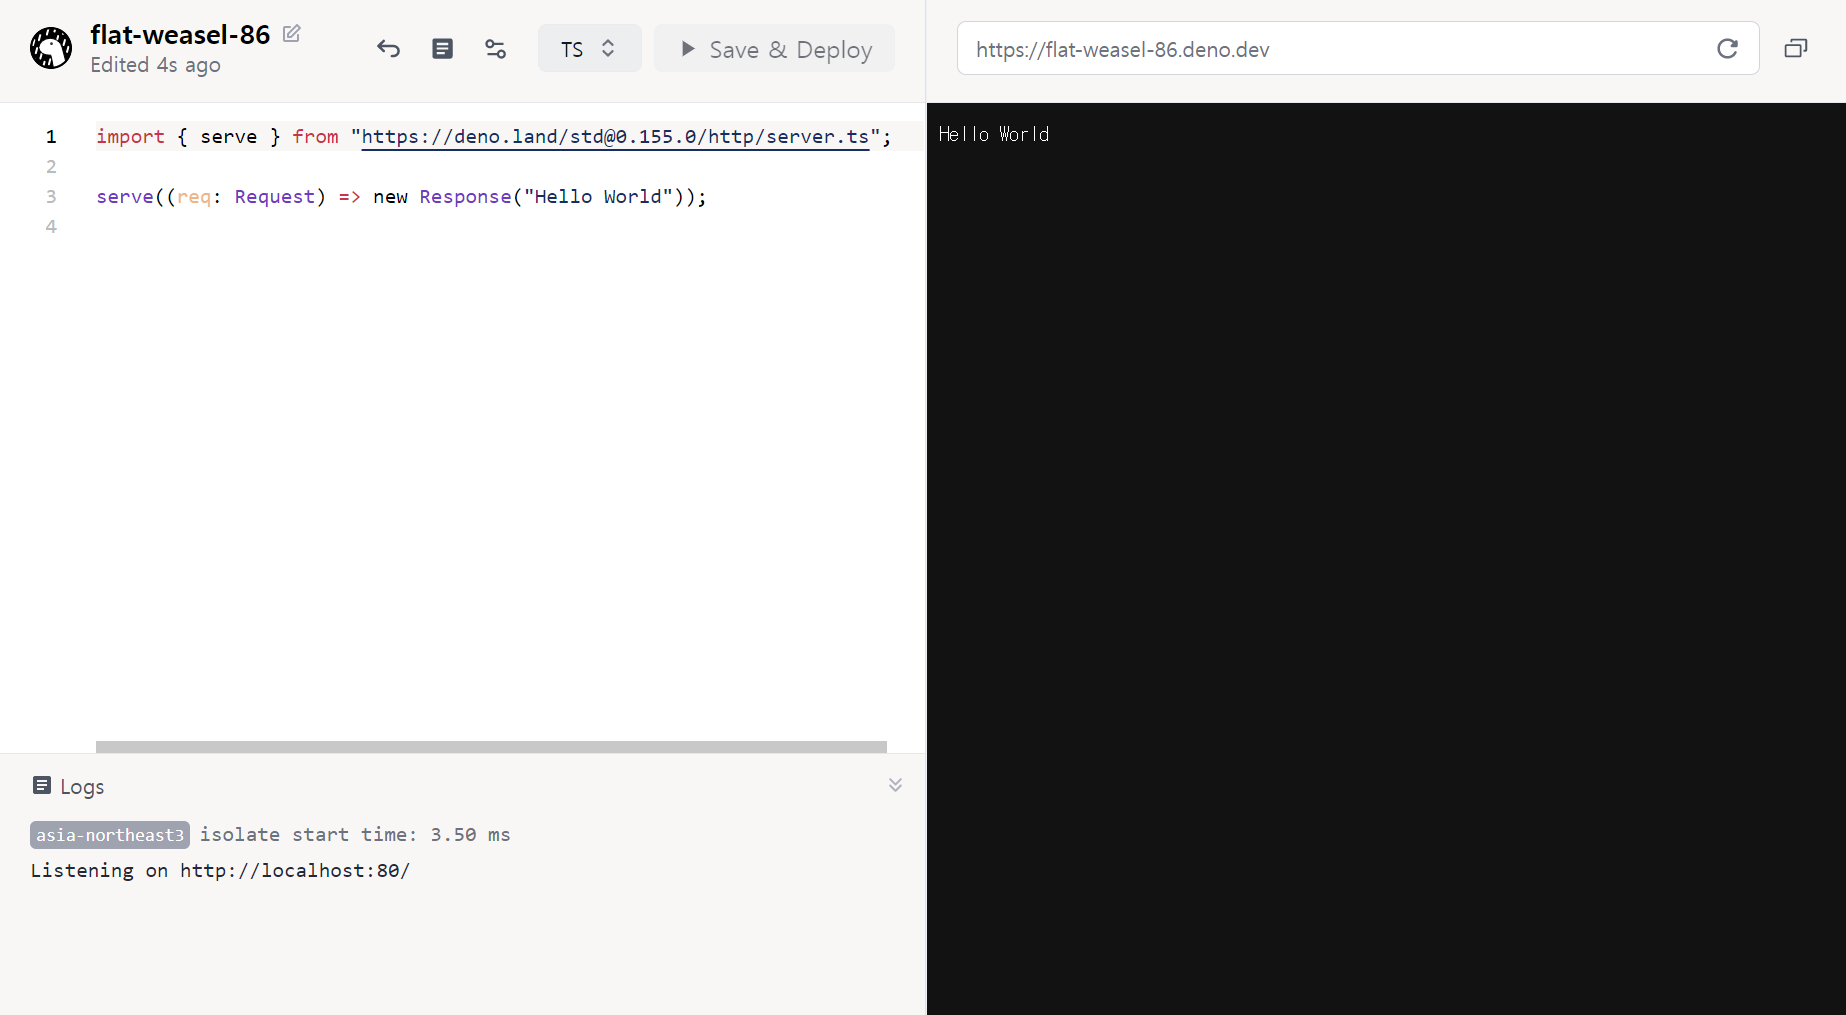
좌측 창은 서버 코드를, 우측 창은 실제 화면을 보여줍니다. 우측 상단 URL로 직접 들어가 보아도 동일한 페이지를 볼 수 있습니다.
serve에 대한 설명은 매뉴얼 페이지를 보시면 되고 이제 본격적으로 첫 프로젝트를 시작 해 보도록 하겠습니다.
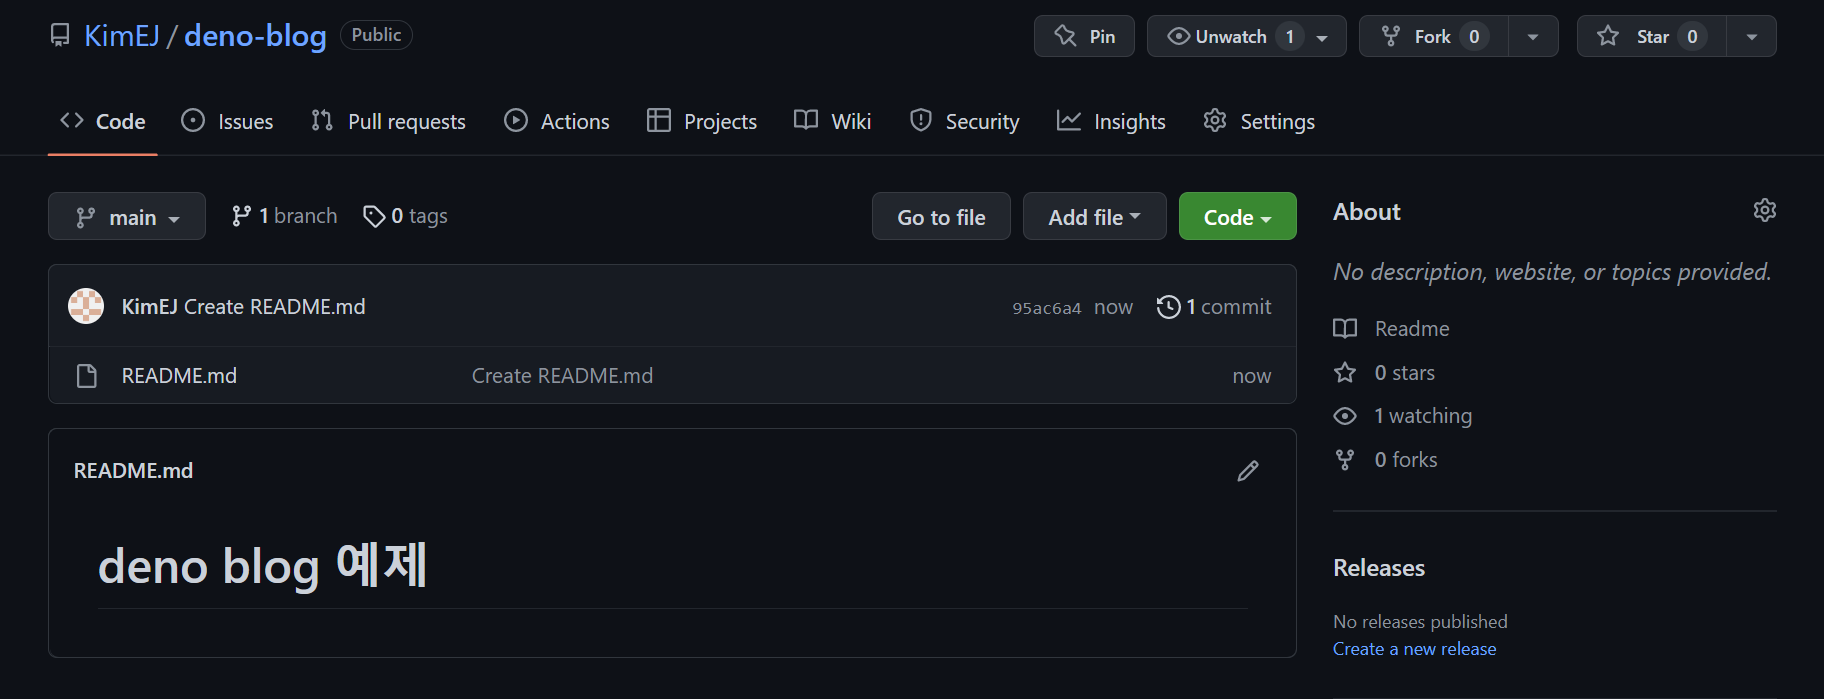
Github repo 생성
아래와 같이 빈 repo를 생성해줍니다.
여기서 생성한 repo에 deno deploy로 배포할 데이터 들을 넣게 됩니다.
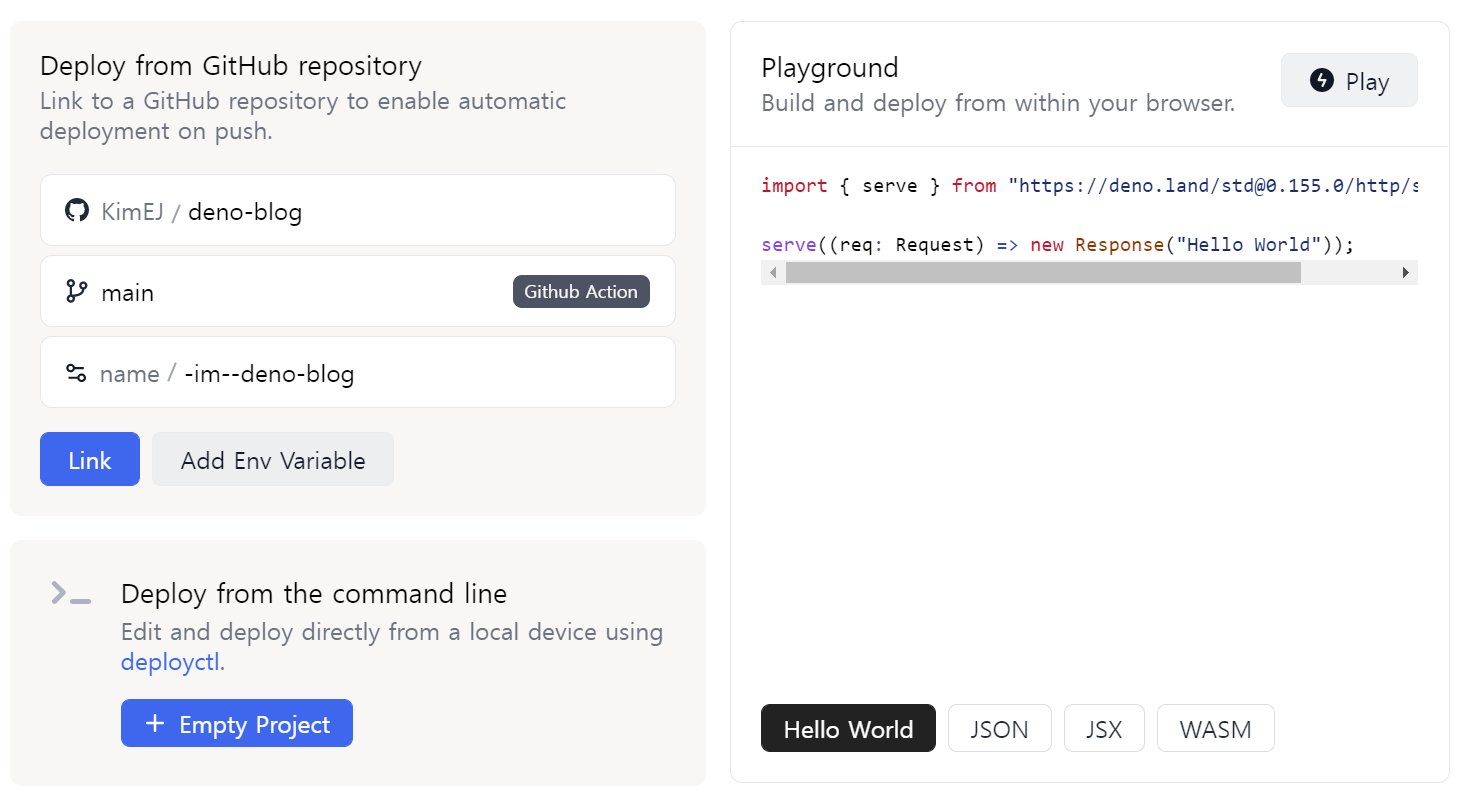
Deno Deploy에 연결
위에서 생성한 repo를 Deno Deploy에 프로젝트를 생성해서 아래와 같이 연결해봅시다.
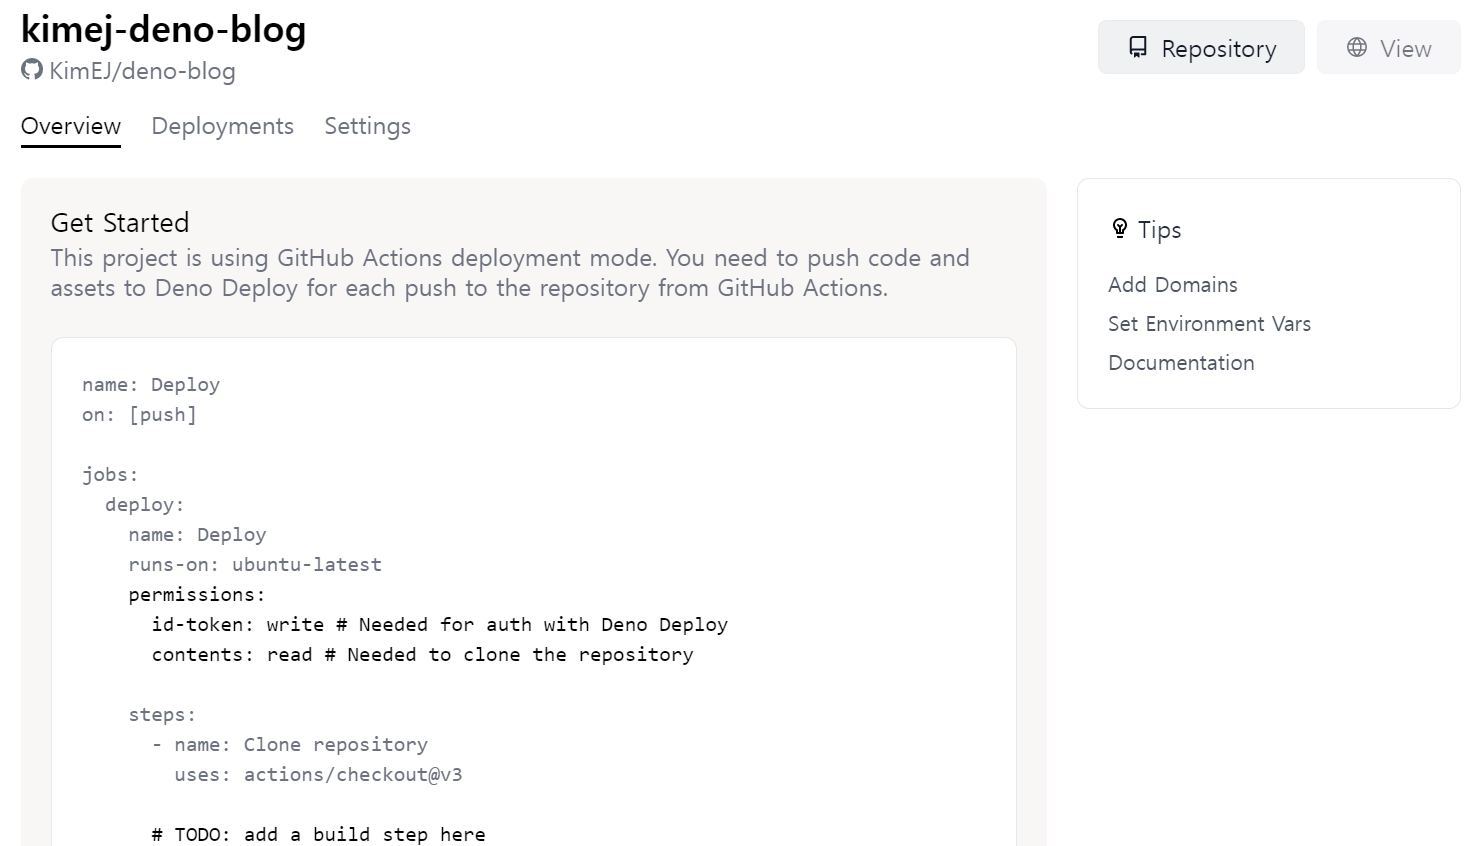
잘 생성 하셨다면 아래와 같이 시작 방법에 대한 설명이 나오게 됩니다.
그럼 본격적으로 개발을 시작해봅시다!
Github Actions
이번 프로젝트에서는 Github Actions라는 Github 자동 배포 툴을 이용해 보겠습니다.
생성해 둔 repo의 .github/workflows/deploy.yml위치에 아래와 같이 코드를 입력해봅시다.
1
2
3
4
5
6
7
8
9
10
11
12
13
14
15
16
17
18
19
20
21
22
name: Deploy
on: [push]

jobs:
  deploy:
    name: Deploy
    runs-on: ubuntu-latest
    permissions:
      id-token: write # Needed for auth with Deno Deploy
      contents: read # Needed to clone the repository

    steps:
      - name: Clone repository
        uses: actions/checkout@v3

      # TODO: add a build step here

      - name: Upload to Deno Deploy
        uses: denoland/deployctl@v1
        with:
          project: "[프로젝트 이름]"
          entrypoint: "./main.ts" # TODO: update entrypoint
deno 코드를 작성해보자
이번 프로젝트의 원본 소스를 보시고 오셔도 좋습니다!
이번 웹 페이지는 deno blog 모듈을 사용해보겠습니다.
위 deploy.yml 파일의 entrypoint 에 작성해 둔 파일을 생성해서 아래 코드를 입력해봅시다.
1
2
3
4
5
6
7
8
9
10
11
12
13
import blog from "https://deno.land/x/blog@0.5.0/blog.tsx";

blog({
  title: "짱귀여운 아가블로그",
  author: "KimEJ",
  avatar: "./avatar.jpg",
  avatarClass: "full",
  links: [
    { title: "Email", url: "mailto:kimuj5090@gamil.com" },
    { title: "GitHub", url: "https://github.com/KimEJ" },
  ],
  background: "#fff"
});
포스트 파일은 posts 디렉터리 밑에 작성하면 됩니다.
아래와 같이 작성 해 보겠습니다.
1
2
3
4
5
6
7
8
9
10
11
12
13
14
15
16
17
18
19
20
21
22
---
title: First post
publish_date: 2022-03-20
abstract: This is the first post.
cover_html: <svg class="w-full" height="350" width="100%" background="black"><circle cx="50%" cy="170" r="150" stroke="white" stroke-width="10" fill="black" alpha="50%"/></svg>
---

It was popularised in the 1960s with the release of Letraset sheets containing
Lorem Ipsum passages, and more recently with desktop publishing software like
Aldus PageMaker including versions of Lorem Ipsum.

Lorem Ipsum is simply dummy text of the printing and typesetting industry. Lorem
Ipsum has been the industry's standard dummy text ever since the 1500s, when an
unknown printer took a galley of type and scrambled it to make a type specimen
book. It has survived not only five centuries, but also the leap into electronic
typesetting, remaining essentially unchanged. It was popularised in the 1960s
with the release of Letraset sheets containing Lorem Ipsum passages, and more
recently with desktop publishing software like Aldus PageMaker including
versions of Lorem Ipsum.

$100, $200, $300, $400, $500
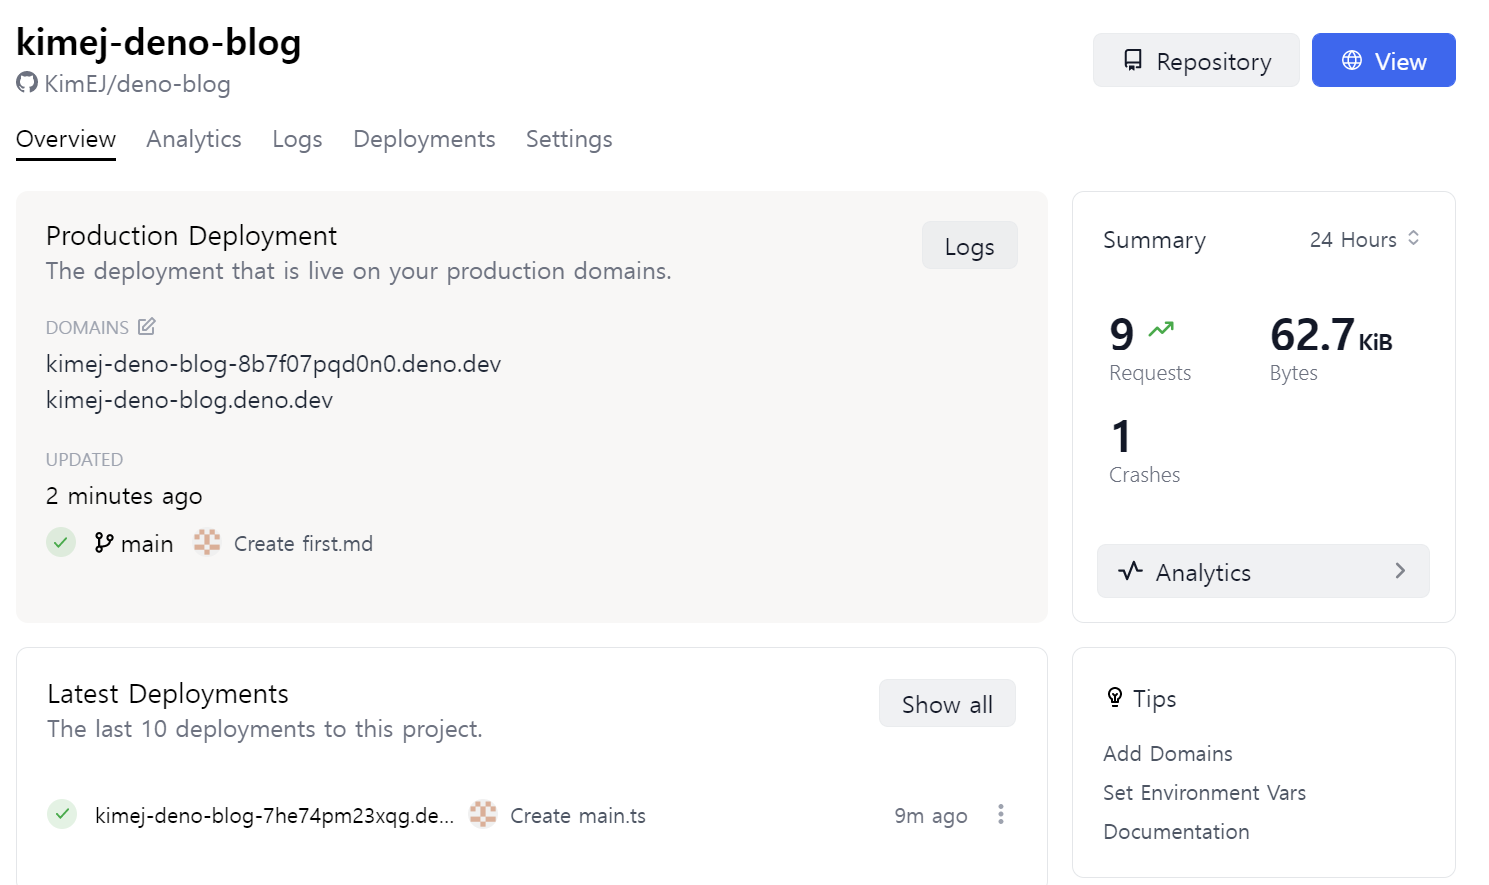
작성 후 deno deploy 에 연결 해 둔 프로젝트에 들어가보면 아래와 같이 자동으로 배포가 되고 있는 것을 볼 수 있습니다.
[project 이름].deno.dev에 접속 해 보시면 아래와 같이 우리가 만든 블로그가 배포되고 있는 보습을 볼 수 있습니다.
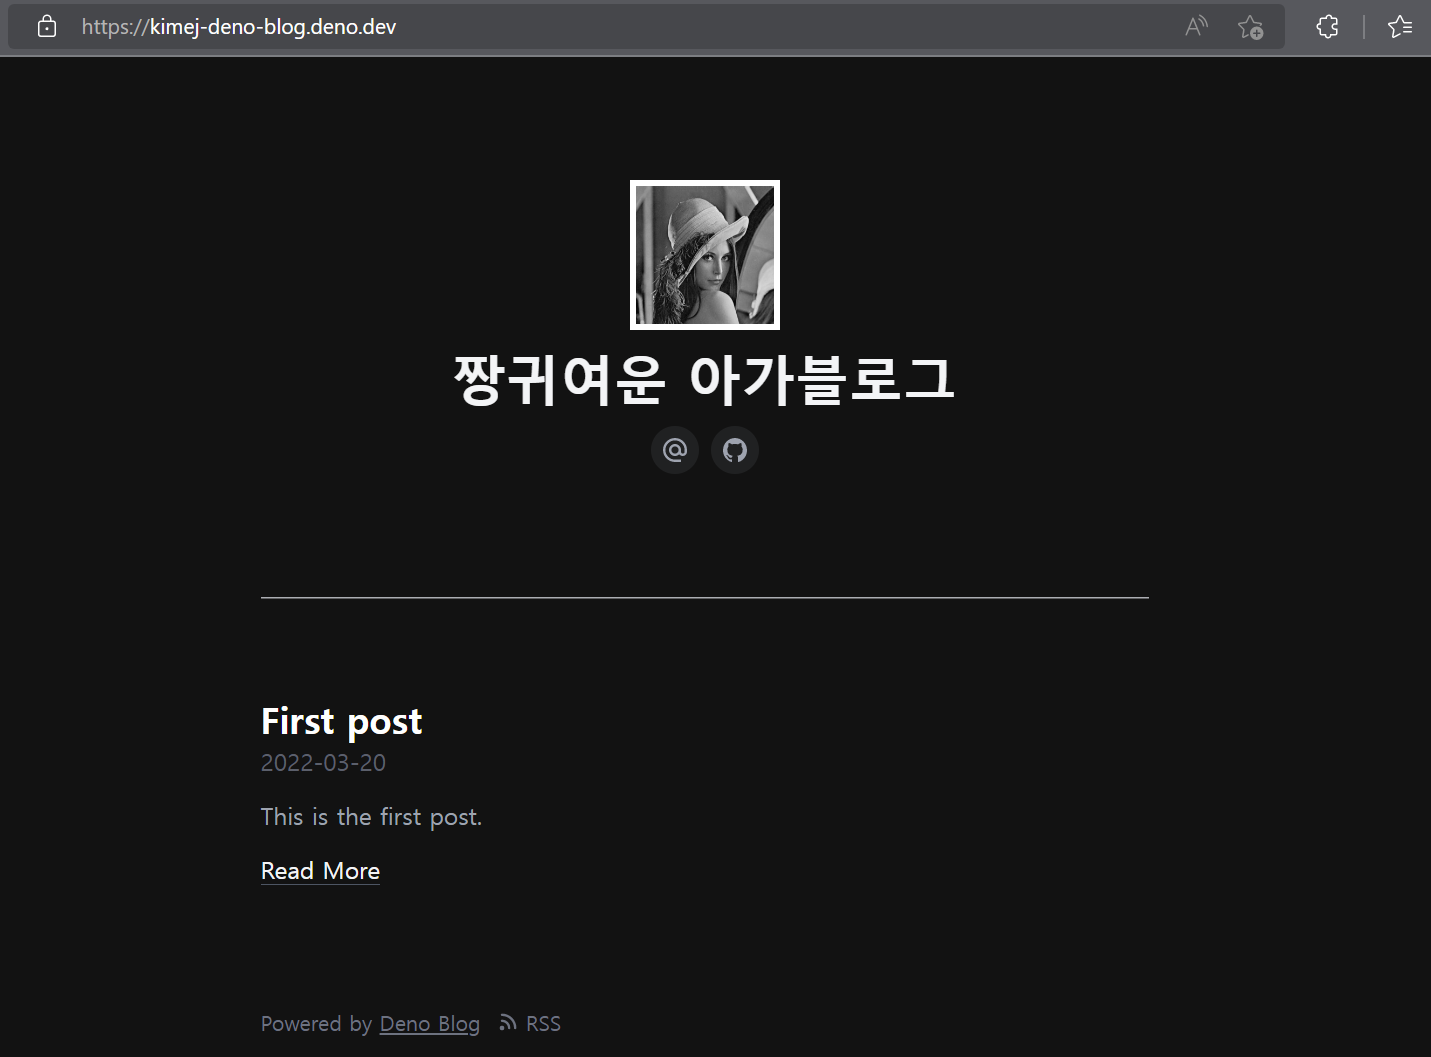
실제 작성한 블로그를 보시면 진짜 배포 되고 있는 모습을 볼 수 있습니다!
TODO
deno는 node와 크게 다르지 않아 일부 아직 미흡한 기능이 필요 없는 toy project에 자주 사용하게 될 것 같습니다.
앞으로 deno를 이용한 프로젝트를 하게 된다면 간간히 소개 하는 기사를 작성해보도록 하겠습니다.